By Emily Friedel
Back in autumn, I wrote about getting your sweet pea seedlings started in pots. (If you missed the first article, you can find it online at https://issuu.com/murrindindiguide/docs/murrindindi_guide_autumn_2023.) By now, you should hopefully have some healthy baby sweet pea plants with strong root systems that are ready to plant out. If not, don’t worry – you can still sow sweet peas direct during spring or raise seedlings in pots, you’ll just have to wait a little longer for the flowers.
Here is the second half of the quick guide to a sensational spring sweet pea display:
Position and soil preparation
Sweet peas are sun-lovers, so pick a spot in the garden where they’ll get plenty of light. A position that is sheltered from the wind is also ideal to avoid damage from being blown around. They love rich, well-draining soil that is slightly alkaline – prepping the soil with plenty of compost is a must, and a dash of lime might be helpful if your soil is on the acidic side.
And don’t forget to have support structures in place for your peas to latch onto and climb over.
Hardening off seedlings
To get your seedlings ready for life in the great outdoors, start leaving them outside during the day for a week or two, putting them back in the greenhouse or cold frame at night. Then leave them outside (day and night) for another week and they should be suitably tough to withstand transplanting.
When to plant
The safest time to plant sweet pea seedlings or sow spring seeds is when the frosts have stopped (around Melbourne Cup Day). Even though sweet peas are frost hardy down to around –4°C, they don’t like being cold and wet. So cold temperatures in early spring can be a problem when combined with rain. However, if you’re keen for the earliest possible flowers and a wet spring isn’t predicted, you can get away with planting them in early spring. You can always put some in the ground early and save some for planting later as an insurance policy.
Planting out
If the weather’s warm, plant your seedlings out on an overcast day or in the evening to avoid heat stress. Sweet peas don’t like having their roots disturbed, so be as gentle as possible when removing them from their pots. Water in with seaweed solution to help them establish.
Ongoing care
Once they’re in the ground, your sweet peas don’t need much. They are quite a thirsty plant, so keep them well watered and use a thick layer of mulch for water retention. If you prepped your soil with a good amount of compost, they won’t need fertilising – in fact, using a high nitrogen fertiliser will just encourage lots of foliage growth at the expense of flower growth. However, they will appreciate a dose of seaweed solution every week or two.
Harvesting flowers
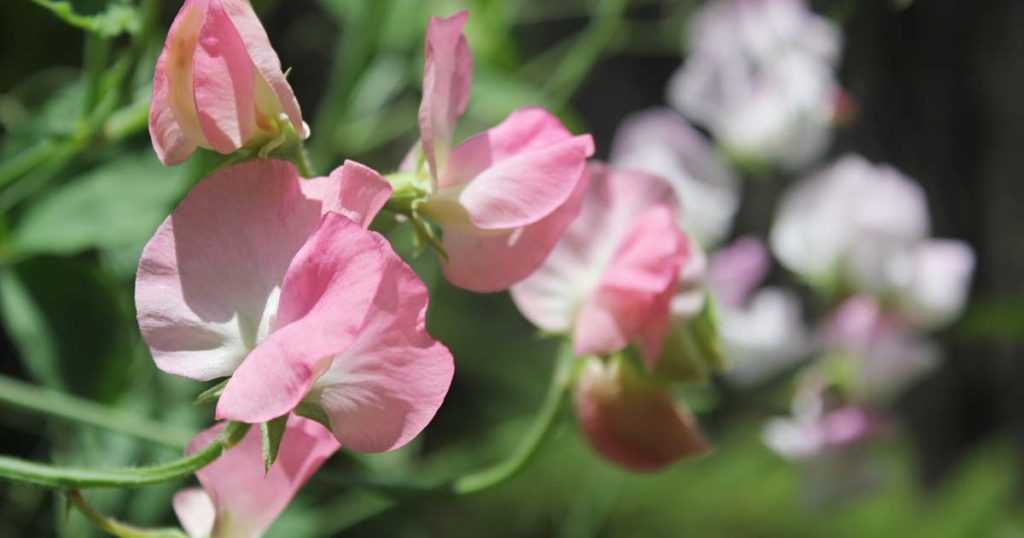
The opening of the season’s first sweet pea blooms is always exciting – their bright colours and heavenly perfume are a wonderful addition to the garden. Even more exciting is that there’s no need to wait before you have beautiful posies of them inside. The more you harvest the flowers, the more the plants will produce. If you want to keep flower production going for as long as possible, prevent the plants from setting seed pods by dead-heading any flowers you don’t harvest.
If you want to collect seeds for the next crop, you can wait until the end of the season to let them go to seed. Sweet peas self-pollinate before their flowers fully open, so you should mostly get seeds that are true to type even if you grow different varieties side-by-side.
Enjoy
Be sure to take the time to fully appreciate your sweet peas, whether outdoors or indoors. I like to sit with a cuppa and watch their blooms nodding in the sun while taking in their delightful fragrance – they’re such a joy to be around. And inside, I keep vases of them on the kitchen windowsill by the sink to make dishwashing more pleasant.
When the season is over and you’re pulling out straggly-looking sweet pea plants, you can indulge in the pleasure of planning a bigger and better sweet pea display for next spring!


